
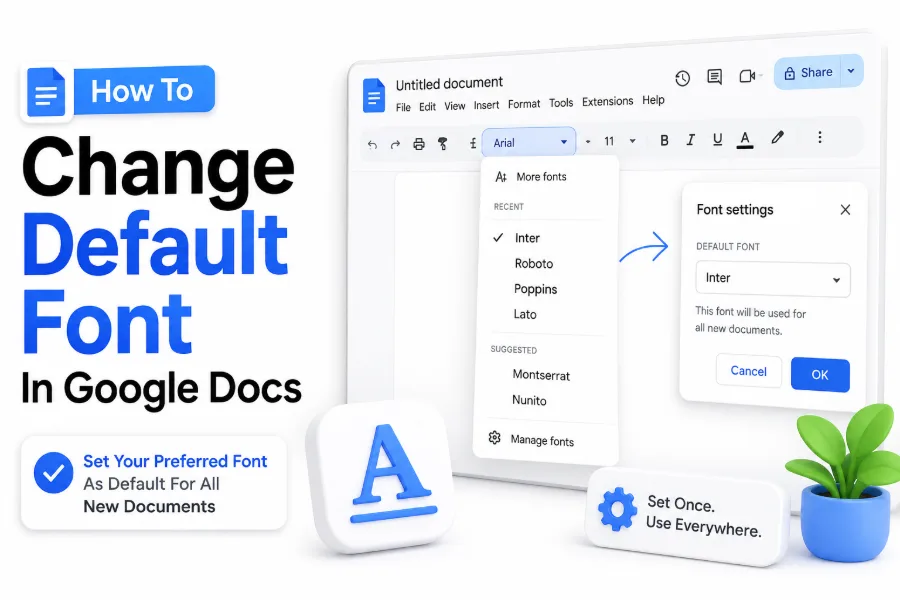
If you write in Google Docs often, the default font can start to feel like a small but constant interruption. Maybe your workplace uses Arial instead of Google’s standard style, or you prefer a cleaner font for reports, lesson plans, proposals, or personal drafts. Learning how to change default font in Google Docs saves time because you no longer need to adjust the font every time you open a new document.
Google Docs does not use a large settings panel for this change. Instead, it lets you update the normal text style inside a document and then save that style as the default for future files. Once you know where the option lives, the process is quick. This guide walks you through the exact steps, explains how headings fit into the same system, and shares practical tips for keeping your documents consistent across different types of writing.
Why Changing the Default Font Matters
A default font controls the starting look of your text before you make any manual changes. When it matches your usual writing style, every new document begins closer to finished. That matters for business documents, school assignments, client work, and any project where formatting consistency is expected.
Changing the default font also reduces repetitive editing. Instead of selecting all text, choosing a font, changing size, and fixing spacing every time, you can set your preferred style once. Google Docs will then apply it automatically whenever you create a new blank document.
How Google Docs Handles Default Font Settings
Google Docs stores default font choices through paragraph styles, especially the Normal text style. Normal text is the main body text used in most documents. When you update this style and save it as your default, Google Docs remembers your selection for future documents.
This setting applies to new documents you create after saving the change. Older documents will usually keep their original formatting unless you update them manually. That separation is useful because it prevents past work from changing unexpectedly when you adjust your preferred writing style.
Quick Benefits of Setting a Default Font
- Saves time on repeated formatting changes
- Keeps reports, essays, and drafts visually consistent
- Helps match brand, school, or workplace style rules
- Reduces formatting mistakes in shared documents
- Makes new Google Docs files feel ready to use
- Supports a cleaner writing workflow from the first line
Step-by-Step Guide to Change the Default Font
Start by opening a new Google Docs document. Type a short line of sample text, then highlight it. Choose your preferred font from the font menu in the toolbar. You can also adjust the font size, text color, and line spacing if those are part of your usual format.
With the formatted text still selected, open the Styles menu in the toolbar. Hover over Normal text, then choose Update Normal text to match. After that, open the Styles menu again, go to Options, and select Save as my default styles.
Choosing the Right Font Before Saving
Before you save a new default, think about where your documents will be read. Arial, Calibri, Times New Roman, Georgia, and Roboto are common choices because they are easy to read and widely accepted. For professional documents, simple fonts usually work better than decorative ones.
Font size matters as much as the font itself. Body text is commonly set between 10 and 12 points, depending on the typeface. If your documents are printed, 11 or 12 points often feels more comfortable. For screen-first reading, a clean 11-point font can work well.
Default Font Settings Comparison
Setting | Where to Change It | Saved with Default Styles
Font family | Toolbar font menu | Yes
Font size | Toolbar size menu | Yes
Text color | Toolbar text color | Yes
Line spacing | Format menu or toolbar | Yes
Normal text style | Styles menu | Yes
Margins | Page setup | No, separate setting
Page orientation | Page setup | No, separate setting
How to Set a Default Font for Future Documents
After updating Normal text, the most important step is saving it as your default style. Many users update the style but miss the final save option. If you skip that part, the current document changes, but future documents may still open with the previous default.
To confirm the change worked, create a new blank document after saving. Type a few words and check the font menu. If your selected font appears automatically, the default was saved correctly. This quick check helps catch mistakes before you start a larger project.
How to Update Headings Along with Body Text
Body text is only part of a polished document. If you regularly use headings, you may want Heading 1, Heading 2, and Heading 3 to match your preferred style as well. This is useful for blog drafts, reports, manuals, proposals, and structured notes.
Format a heading exactly how you want it, then open the Styles menu. Hover over the heading level you are editing and choose the update option. Once your heading styles and Normal text are set, save everything through Options and Save as my default styles.
Checklist Before Saving Your Default Styles
- Choose a readable font for your document type
- Set a practical body text size
- Adjust line spacing if needed
- Update Normal text to match your sample
- Format and update heading styles if you use them
- Save all changes as your default styles
- Test the result in a new blank document
How to Add More Fonts in Google Docs
Google Docs includes many fonts, but not all of them appear in the default font menu at first. To add more, click the font dropdown and select More fonts. From there, you can search by name, filter by style, and add fonts to your main list.
This is helpful when you need a specific brand font alternative or a better reading font for long documents. Keep in mind that Google Docs uses web-based fonts, so the exact font you want may not always be available. Choose a close match when necessary.
Best Fonts for Professional Google Docs
For workplace documents, choose fonts that look clean and remain readable at standard sizes. Arial, Roboto, Lato, and Source Sans Pro are practical sans serif options. They work well for proposals, meeting notes, standard operating procedures, and internal documentation.
For academic or formal writing, serif fonts may be preferred. Times New Roman, Georgia, and Merriweather can create a more traditional look. Always check assignment, publisher, or company guidelines before changing defaults for documents that must follow a specific format.
Practical Font Selection Tips
- Use serif fonts for formal or print-heavy documents
- Use sans serif fonts for screen reading and business drafts
- Avoid decorative fonts for body text
- Test readability at 100 percent zoom
- Keep body text between 10 and 12 points for most documents
- Use stronger styling for headings instead of unusual fonts
How to Reset Google Docs Default Font
If you change your mind, Google Docs lets you return to the original default styles. Open a document, go to the Styles menu, choose Options, and select Reset styles. This restores the standard Google Docs style settings for that document.
To make the reset apply to future documents, save the reset styles as your default again. This step matters because resetting one document does not always update your future blank documents unless you save the restored styles as your personal default.
When Resetting Styles Makes Sense
Resetting is useful if your documents start behaving inconsistently after several formatting changes. It can also help when a shared document carries copied styles from another source. Resetting gives you a clean base before rebuilding your preferred font and heading settings.
You may also want to reset styles if you are switching roles, clients, or writing formats. A font that works for creative drafts may not fit legal summaries, academic papers, or business reports. Starting fresh helps avoid carrying outdated formatting into new work.
Common Default Font Problems and Fixes
Problem | Likely Cause | Fix
New docs still use old font | Default styles were not saved | Save as my default styles
Only current document changed | Normal text was updated locally | Use Options and save defaults
Headings look different | Heading styles were not updated | Update each heading level
Copied text changes font | Source formatting came with pasted text | Paste without formatting
Old files did not change | Defaults apply mainly to new docs | Update old documents manually
Changing Default Font on Google Docs Mobile
The Google Docs mobile app lets you change fonts inside a document, but default style controls are more limited than on desktop. For the most reliable result, set your default font from the web version of Google Docs using a computer browser.
Once saved through the desktop version, future documents should follow those defaults when created under the same Google account. If mobile documents do not reflect the change right away, close and reopen the app or create a new document after syncing.
What You Can Still Do on Mobile
On mobile, you can select text, open formatting options, and change the font, size, and basic styling. This is useful for quick edits, but it is not the best place to manage long-term document defaults. Treat mobile formatting as document-level editing.
If you often work from a phone or tablet, set your preferred defaults on desktop first. Then use the mobile app for writing and smaller adjustments. This keeps your main formatting system stable while still giving you flexibility when editing away from your computer.
How Default Fonts Work in Shared Documents
Shared documents can behave differently because each file carries its own styles. If you open a document created by someone else, their formatting may remain in place. Your personal default font does not automatically override the document owner’s existing style choices.
If you have editing access, you can update Normal text inside that shared file. However, be careful when collaborating. Changing styles in a shared document can affect everyone’s view and may conflict with team standards or template rules already in place.
Best Practices for Team Documents
For teams, it is better to agree on a shared document template instead of relying on each person’s personal defaults. A template can include approved fonts, heading styles, spacing, headers, footers, and other layout details. This keeps everyone aligned.
If your organization has a style guide, mirror those rules in Google Docs styles. You can also create a reusable file and duplicate it for new projects. For more formatting help, see [Internal Link: Google Docs Formatting Tips] for related document setup advice.
Team Formatting Tips
- Use a shared template for recurring documents
- Match company or department style guidelines
- Avoid changing shared styles without agreement
- Use comments when proposing formatting changes
- Keep headings consistent across all contributors
- Assign one person to manage final formatting
How to Use Templates with Your Preferred Font
Templates are useful when default styles alone are not enough. A default font handles basic text, but a template can also include title pages, tables, headers, footers, page numbers, and section layouts. This is ideal for reports, invoices, lesson plans, and proposals.
To make your own template, create a document with your preferred styles and layout. Then duplicate it whenever you start a similar project. If you use Google Workspace, your organization may also allow custom templates in the template gallery.
When a Template Is Better Than a Default Font
Use default font settings for everyday writing. Use templates when the document needs repeated structure. For example, a weekly report may need the same headings, table format, footer, and spacing every time. A template preserves all of that in one place.
Templates also reduce mistakes when multiple people create similar documents. Instead of asking every team member to change settings manually, you give them a ready-made starting point. That keeps formatting decisions consistent without slowing down the writing process.
Default Font Versus Document Template
Feature | Default Font | Template
Best for | Everyday blank documents | Repeated structured files
Controls body text | Yes | Yes
Controls headings | Yes | Yes
Includes page layout | Limited | Yes
Includes tables or sections | No | Yes
Useful for teams | Somewhat | Very useful
How to Make Existing Documents Match Your New Default
Changing the default font does not automatically update older files. To refresh an existing document, select the text you want to change and apply your preferred Normal text style. For long documents, use Select all carefully, especially if the file contains tables or special formatting.
After applying the font, review headings, lists, tables, and footnotes. These areas may need separate adjustments. Imported content and pasted text can carry hidden styling, so a quick formatting pass helps make the final document look consistent from top to bottom.
Using Clear Formatting Carefully
Google Docs includes a Clear formatting option that removes styling from selected text. This can be helpful when pasted content brings unwanted fonts, colors, or spacing. After clearing formatting, you can apply your saved Normal text style again.
Use this option with care in polished documents. It may remove bold text, italics, links, and other useful formatting. If you only need to change the font, updating the selected text manually may be safer than clearing everything at once.
Useful Existing Document Workflow
1. Open the older Google Docs file
2. Make a copy if the document is important
3. Select the body text that needs updating
4. Apply your preferred font and size
5. Update headings separately
6. Check lists, tables, links, and footnotes
7. Save the document after reviewing layout changes
How to Keep Formatting Consistent When Pasting Text
Pasted text is one of the most common reasons Google Docs formatting becomes messy. When you copy from websites, PDFs, email, or Microsoft Word, the text may bring its original font, size, color, and spacing. That can override your default style.
To avoid this, use paste without formatting. On many computers, the shortcut is Ctrl + Shift + V on Windows or Command + Shift + V on Mac. This inserts plain text that follows the formatting around it, making your document easier to control.
Fixing Pasted Text After It Lands
If you already pasted formatted text, select the affected section and apply Normal text from the Styles menu. You can also use Clear formatting if the text has stubborn colors, odd spacing, or unusual font sizes. Then reapply any needed bold or links.
For writers and editors, paste without formatting is worth making a habit. It keeps drafts cleaner and reduces the time spent fixing visual inconsistencies. For related workflow ideas, visit [Internal Link: Google Docs Productivity Tips] for ways to speed up document editing.
Why Your Default Font May Not Appear
There are a few reasons your selected default font may not show up. The most common issue is forgetting to save styles as the default after updating Normal text. Another possibility is that you are working in a document with its own custom styles.
Account differences can also cause confusion. If you use multiple Google accounts, each account may have its own default styles. Make sure you are signed into the account where you saved the font, especially when switching between personal and work profiles.
How to Troubleshoot Quickly
Open a brand-new blank document under the same account. If the new file uses your preferred font, the default setting works. The issue is probably limited to a specific document. If the old font appears, repeat the update and save process.
Also check whether a browser extension or copied template is affecting the document. While uncommon, templates and imported files may carry style settings that differ from your account defaults. Starting with a clean blank document is the fastest way to test the setting.
Quick Troubleshooting List
- Confirm you saved styles as default
- Test with a new blank document
- Check that you are using the correct Google account
- Update Normal text, not only selected text
- Review document-specific styles
- Avoid starting from an old copied file
- Refresh Google Docs after saving changes
Best Practices for Blog Writers and Content Teams
For blog writers, a reliable default font makes drafting easier, even if the final article will be published in a CMS. A clean Google Docs format helps editors read, comment, and revise without being distracted by inconsistent styling or pasted web fonts.
Content teams should agree on basic drafting styles, including body font, heading levels, spacing, and link formatting. This does not replace the website’s final design, but it makes collaboration smoother. Clean drafts also transfer more predictably into publishing tools.
Practical Example for Blog Drafts
A blog team might use Arial 11 for body text, Heading 2 for main sections, and Heading 3 for subsections. Links can remain blue and underlined so editors can spot them quickly. This simple setup is easy for writers and reviewers to follow.
When every draft uses the same structure, editing becomes faster. Editors can focus on clarity, search intent, examples, and accuracy instead of cleaning up font issues. Consistent Google Docs formatting also helps when exporting, sharing, or moving content into WordPress.
Recommended Settings by Document Type
Document Type | Suggested Font | Suggested Size
Business report | Arial or Roboto | 11 pt
Academic paper | Times New Roman | 12 pt
Blog draft | Arial or Lato | 11 pt
Resume draft | Calibri or Arial | 10.5-11 pt
Lesson plan | Georgia or Arial | 11-12 pt
Internal notes | Roboto or Arial | 10-11 pt
Accessibility Tips When Choosing a Default Font
A good default font should be comfortable for many readers, not just visually pleasing. Clear letter shapes, enough spacing, and a practical size make documents easier to scan. This is especially important for training materials, public documents, and files shared with broad audiences.
Avoid very thin fonts, cramped typefaces, or small sizes for long text. If readers need to zoom in immediately, the font choice may be working against the document. A slightly larger, cleaner style often improves readability without making the file look informal.
Color and Contrast Considerations
Default font color should usually stay black or a very dark gray. Light gray body text can look stylish on some screens but becomes harder to read, especially when printed. Strong contrast is a simple way to improve usability.
Be cautious with colored body text. Color can help headings or callouts stand out, but long passages should remain easy on the eyes. If you need branded colors, reserve them for headings, dividers, or accents rather than entire paragraphs.
Accessibility-Friendly Font Habits
- Choose fonts with clear letter shapes
- Keep body text large enough for comfortable reading
- Use strong contrast between text and background
- Avoid all caps for long headings or paragraphs
- Keep line spacing open enough for scanning
- Test printed pages before using a font widely
Mistakes to Avoid When Setting Defaults
One common mistake is changing selected text but never updating Normal text. That only changes the current selection. To create a lasting default, the style itself must be updated, then saved through the Options menu as your default style.
Another mistake is choosing a font because it looks interesting in a short sample. A font may look good in a title but feel tiring across ten pages. Always test your choice with several paragraphs before making it your everyday default.
Overstyling Headings and Body Text
Too much styling can make documents harder to read. Multiple fonts, bright colors, and inconsistent heading sizes create visual noise. A strong document usually uses one font family for body text and simple variations for headings.
If you want contrast, use size, weight, and spacing before adding more fonts. For example, a bold 16-point Heading 2 paired with 11-point body text is often enough. Simple systems are easier to maintain and better for collaboration.
Default Font Mistakes to Avoid
- Saving changes before updating Normal text
- Forgetting to save styles as the default
- Using decorative fonts for body paragraphs
- Choosing a font too small for readers
- Applying too many font styles in one document
- Assuming old documents will update automatically
- Changing shared document styles without checking first
Conclusion
Setting your preferred Google Docs font is a small change that can make daily writing noticeably easier. Once you update Normal text and save it as your default style, new documents start with the font, size, and spacing you actually want to use. That means fewer repetitive edits and cleaner drafts from the beginning.
The best setup depends on your work. A student may need Times New Roman at 12 points, while a business writer may prefer Arial or Roboto at 11 points. Teams may benefit from templates, while solo users may only need a simple default style change. The key is to choose a readable font, save it correctly, and test it in a new blank file. With a few careful settings, you can make how to change default font in google docs a quick one-time task instead of a repeated formatting chore.
FAQ
Can I change the default font in Google Docs permanently?
Yes, you can save a preferred font as your default style for future documents. Update Normal text to match your chosen font, then use the Styles menu and save it as your default styles.
Does changing the default font affect old documents?
No, older documents usually keep their existing formatting. The default font mainly applies to new documents created after the change. You can update older files manually by selecting text and applying your preferred style.
Can I set different default fonts for different Google?
Yes, default styles are tied to the Google account you are using. If you switch between personal and work accounts, you may need to set your preferred font separately in each account.
Can I use custom fonts in Google Docs?
You can add fonts from Google’s font library through the More fonts option. However, you cannot upload any font file you want directly into Google Docs for standard document editing.
Why does pasted text ignore my default font?
Pasted text often carries formatting from its original source, such as a website, email, or Word document. Use paste without formatting to make the text follow your current Google Docs style.
0 Comments